Teaching Strategy: Using Kahoot! Software
1.Go to www.kahoot.com (or just Google Kahoot if you forget it)
2.Create an account. Use your school info (email and such)
 3. If you’ve already created an account, log in
4. Then you’re at your Kahoot homepage
a.On the right-hand side of the page, you’ll see the following:
1.My Stats – lets you know how many Kahoots (review games) you have, the questions in all of them, how many times you / others have played it, how many have played it, and how many other people shared it
2.My Recent Results – click on the cloud downloads to access the Excel spreadsheet, or just click “all results” to do the same thereafter
-Community – interact with the Kahoot team and others
-You’ll use the left-hand side of the page most often, so let’s focus on that (see below)
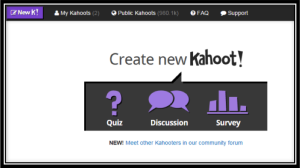
1.To the very left, you can click on “New K!” any time to create your first Kahoot, which is just the name they use for the program. You will create one of them by clicking on the respective icon:
2.Quiz (most common) has correct answers and can be used as a grade; for the sake of this training, we’re going to look at the Quiz portion
i. Discussion / Survey are essentially the same thing; they merely poll the students for your own input. In addition, it’s set up just like a Quiz is
ii.After you create Kahoots, they’ll always be accessible under “My Kahoots.” It’ll also tell you how many you have in the (parentheses)
iii. If you just want to see what others have, click on Public Kahoots. They’re all available for download for free.
iv. Any other help you need can be troubleshot in FAQ / Support
Creating a Kahoot!
5.Now that we’re signed in, we’re ready to create our first Kahoot!
6.Start by giving your Kahoot a name. Keep it simple.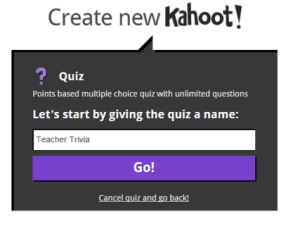
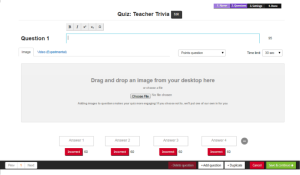
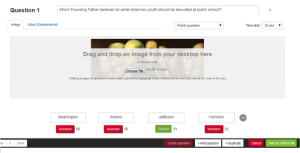
7.The next thing you go to is the Question 1 page.
a.At the top right you’ll see the settings toolbar. That’ll remain there while you’re in the Edit stage
b.In the center, you see where to type for the question. You can also edit the text
c.Below that, you can add an image/video (recommended but not required), change whether the question counts towards points or not, and also change the time limit (30 seconds is recommended)
d. Lastly, punch in some answers; currently, each question can have up to 4 answers; add or subtract choices using the “+” and “-“ to the right of the questions
e.Then click on the “incorrect” tab, changing it to the correct answer
f.See the bare question above and the completed question below
g.Then move on to your next question “Add question” or end the quiz
 Repeat that process for however many questions you put into the program
9.How many questions should you make? Well, that depends…
a.Kahoot recommends making 10 questions or less. If you’re uncomfortable with tech or get frustrated easily, keep it simple. Stick to that requirement
b.However, I’ve already had 30 questions in a Kahoot! That takes the whole period and I have students who were experienced with the software, so that helped
10. When finished all your questions, look at the bottom toolbar
a.Cycle through all the questions with the buttons: “Previous,” “Next,” or the question number
b.You can continue to delete, add, or duplicate questions
c.Cancel will walk you away from the Kahoot!; however, just like a Microsoft Office program, it will ask you if you’d like to save as a draft
d. To finish, click “Save & Continue”
![]() 11. Afterward, you can reorder the questions or edit them one last time. This is a new screen that’s been added in the last 2 months
11. Afterward, you can reorder the questions or edit them one last time. This is a new screen that’s been added in the last 2 months
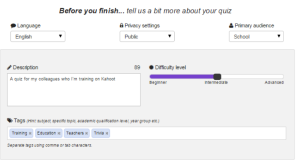
12. Then, before you finish, add some labels to your Kahoot if you’d like.
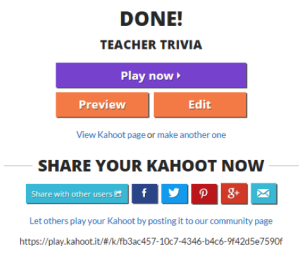
13. Then, when you’re done, you have a few options as to what to do. I usually just close the program and come back to it later.
Playing a Kahoot!
14. Sign in.
15.Click on My Kahoots!
16. Click the play button on the Kahoot! you’d like to use; you’ll see this screen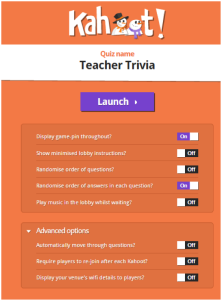
-There are many options to use while you Kahoot!
-Feel free to use whatever ones you’d like, but I recommend 2:
-Display game-pin throughout – in case students get kicked out of a Kahoot (hey, it’s still a Beta; it still happens)
-Randomize order of answers in each question – just because I’m a teacher, and because I can (this also lends the teacher to realise / realize that this game is British!)
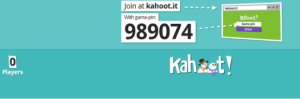
- After launching, you’ll be taken to a loading screen. This is when you’ll direct students to the very simple website on their laptops, tablets, phones, or whatever device they have – KAHOOT.IT
- Then have them put in the game-pin
- Then they choose a “nickname”
- I’d recommend having the students use their real names; that way you can mine the data after playing
- If you don’t like their nickname, you can kick them out by just 2x-clicking on the name
- Then they can rejoin and use a more appropriate moniker
- Once everyone has joined, click “Start Now”
- Once you start, you’ll be graced with the intro screen
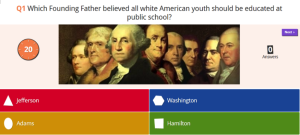
- Then it’ll deposit you (and the student players) onto the Q1: Screen
- Here’s what the students see during a question:
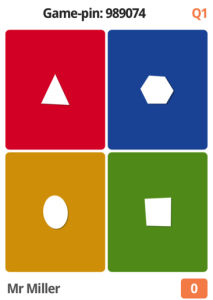
- They see the shapes (not the answers – they have to look to the screen for them)
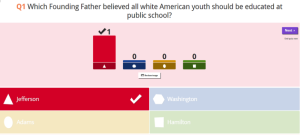
- They see if they answered the question correctly (green screen) or incorrectly (red screen); tip: this is really helpful for teachers to scan the room while walking around!
- They see their score – if they’re not in first place, it’ll compare them to someone else (“You’re X points behind Student Y”)
17. After launching, you’ll be taken to a loading screen. This is when you’ll direct students to the very simple website on their laptops, tablets, phones, or whatever device they have – KAHOOT.IT
18. Then have them put in the game-pin
19. Then they choose a “nickname”
-a.I’d recommend having the students use their real names; that way you can mine the data after playing
b.If you don’t like their nickname, you can kick them out by just 2x-clicking on the name
c. Then they can rejoin and use a more appropriate moniker
d.Once everyone has joined, click “Start Now”

20.Once you start, you’ll be graced with the intro screen
21.Then it’ll deposit you (and the student players) onto the Q1: Screen
22.Here’s what the students see during a question.
-They see the shapes (not the answers – they have to look to the screen for them)
-They see if they answered the question correctly (green screen) or incorrectly (red screen); tip: this is really helpful for teachers to scan the room while walking around!
-They see their score – if they’re not in first place, it’ll compare them to someone else (“You’re X points behind Student Y”)

- Afterward, check your answers
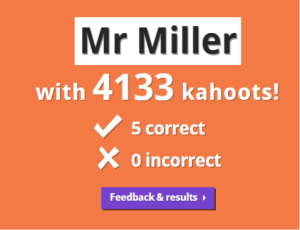
- And, of course, the all student-attentive scoreboard
- At the end, the game will be announced on the students’ devices, and a winner will be declared!

25. At the end, the game will be announced on the students’ devices, and a winner will be declared!
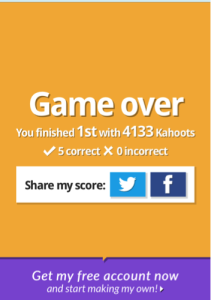
26. Lastly, students can comment on the game. Expect positive results!
27. Always feel free to click “Final results” to download an Excel spreadsheet of the game.


Great article! Another idea is to have students make the Kahoots! This moves students from recall to the creation level on Blooms Taxonomy! Student get a huge kick out of playing their own Kahoots and it saves teacher-time! I’ve built a free scaffold to assist: https://www.teacherspayteachers.com/Product/FREE-Student-friendly-Kahoot-Scaffold-3447507